3. Initial model inspection in Moorhen
Go to the I/O tab in the em_placement job. You will see a list of the input and output nodes for this job. You can select these and then launch additional viewing utilities which will be preloaded with your selections.
Some are external programs, e.g. Coot, Chimera/X, Relion Display and Terminal. These will only be active if the programs are available, and will usually only work when Doppio is running locally. As a special exception, if you are running this tutorial remotely on the STFC Ada training system, clicking these buttons will open the corresponding program on the virtual desktop.
Others are internal web apps such as Moorhen and UglyMol which work in either local or remote modes of Doppio.
Here we will manually edit the model directly in Doppio using Moorhen. Moorhen is the new web version of Coot which uses Coot’s processing tools in the background but with a new browser-based UI.
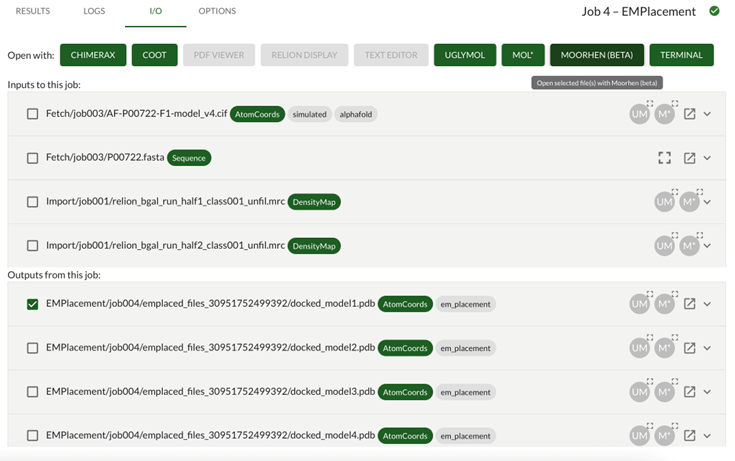
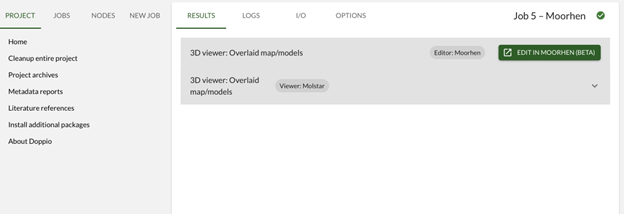
Outputs: EMPlacement/jobXXX/emplaced_files_XXX/docked_model1.pdb
Or whichever was the highest LLG scoring model
…and then click Moorhen (beta) to open the model.
From Moorhen, open the postprocessed masked map (PostProcess/job030/postprocess_masked.mrc). Click the menu icon in the top left, select Doppio Files, find the file and click the OPEN button next to it.
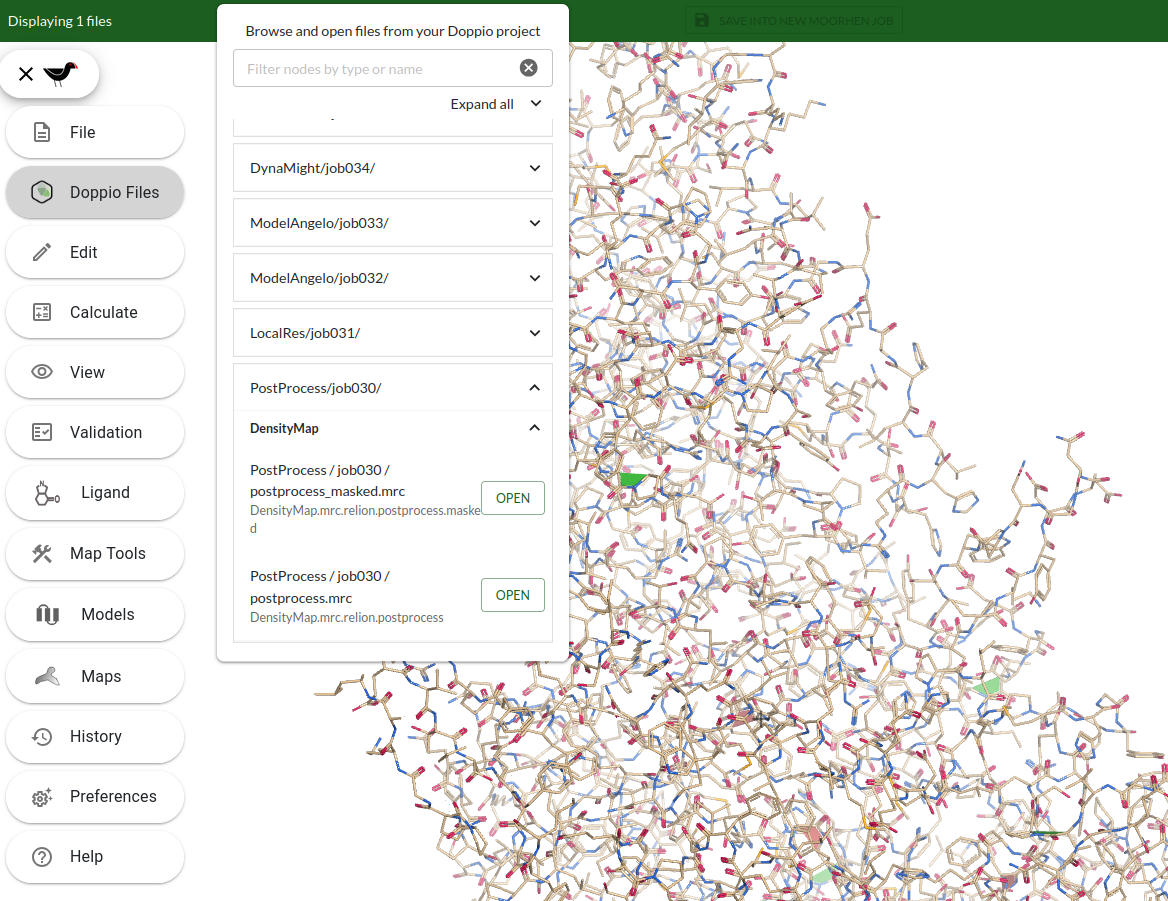
NOTE: Your browser will automatically download the data so there may be a short delay depending on the size of the files and the connection speed.
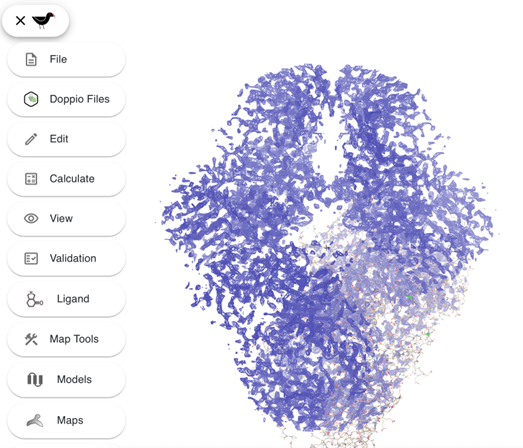
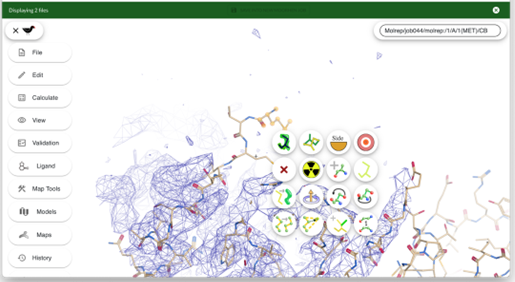
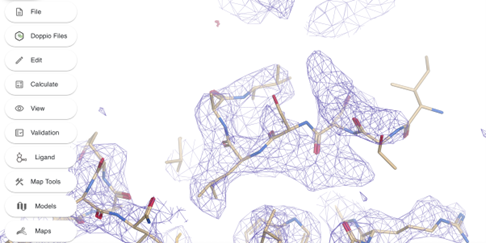
Here you can see the model and the density map. If your computer is busy or running low on memory the graphics can be a bit laggy. You can try reducing the size of the window and/or reducing the displayed map radius:
Click on the Moorhen icon…
… and select Maps from the side panel.
Set the map radius to ~20.
3.1. Getting started in Moorhen - Controls
You can skip this section on Moorhen controls if you have already done the Moorhen tutorials.
To learn more about Moorhen, you can find its own tutorials available online:
https://moorhen-coot.github.io/wiki/
https://moorhen-coot.github.io/wiki/2024/09/03/Moorhen-Tutorial-1.html
https://moorhen-coot.github.io/wiki/2024/05/20/Moorhen-Cryo-EM-Tutorial.html
Note: Currently, some functionalities in Moorhen are still in development and not all functionalities you may have used in Coot are implemented in Moorhen. This means one might have to move to Coot for more advanced model building.
Note: Moorhen can get slow or unresponsive if multiple commands (especially using keyboard/mouse shortcuts) are run in quick succession before the last one finishes (you can see a spinning wheel at the top right if any process is currently running).
3.1.1. List of controls
From the Moorhen side panel: click Help -> Show controls... .
For a less comprehensive list, press h to toggle a summary list of controls.
To customise key bindings, go to Preferences → Configure Shortcuts.
In Help → Go to Moorhen wiki, you can find other tutorials.
3.1.2. Zoom in and out
Four options:
Use the mouse scroll wheel (you can adjust the speed in
Preferences -> Mouse sensitivity...)Alt +click and hold left mouse button and drag up and downPinch to zoom on a trackpad
On most laptops, two finger drag up and down on the trackpad
3.1.3. Recentre the display
There are multiple ways to centre the view on a specific residue:
Define atom to recentre on
a) Using the menu options:
Edit -> Go to...
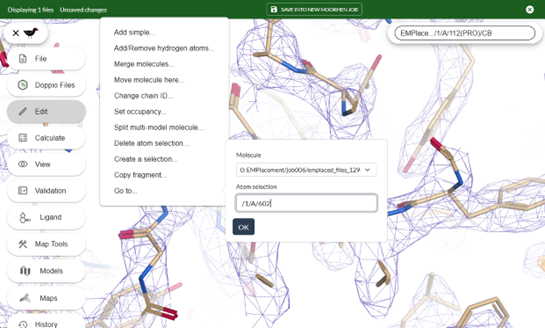
Use the notation /model/chain/residue, e.g. /1/A/602/ for residue 602 on chain A of model
b) Shift + G will display a pop-up box where you can type a residue number (note: just the number alone here (i.e. 602), not the /model/chain/residue notation). Click on the tick icon to go to the residue or press tab and enter.
c) From the menu options, select Models and Sequences to open the Sequence viewer.
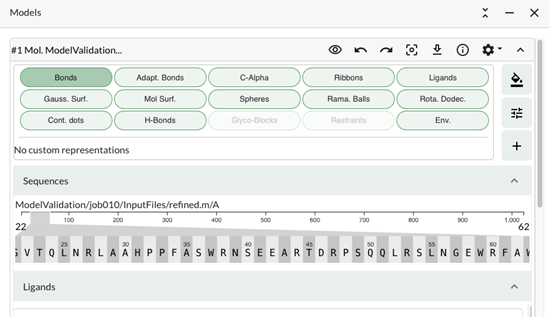
This shows a zoomed in view of a sequence segment which can be moved by dragging the slider along the sequence. The length of the zoomed segment can also be changed by changing the width of the slider (Mouse click at the end and drag). You can navigate along the sequence and/or recentre by clicking on the residues in the zoomed segment.
d) Visually select an atom to recentre on. Click the middle mouse button (or option click on a Mac) on an atom in the graphics window
Move forwards or backwards along chain with the keyboard
Use Space to move forward (towards the C-terminus) and Shift + Space to move backwards (towards the N-terminus).
3.1.4. Change the Clipping plane
Keyboard keys:
● 1 - Increase front clip
● 2 - Decrease front clip
● 3 - Decrease back clip
● 4 - Increase back clip
The clipping can be also changed in View -> Scene Setting. Also the background color can be set there, many people prefer to work with a black background.
3.1.5. Recontour the Map
NOTE: Change these options slowly as they can make your computer very busy. Two options:
Open the
Mapspanel and use theLvlslider to change to contour level.Mouse:
Ctrl + scroll wheel(you can adjust the speed inPreferences -> Mouse wheel map contour sensitivity...). Note that the re-rendering can take a while.
You can also use the Radius slider in the Maps panel or the keys ’[’ ’]’.
N.B. if multiple maps are open, only the contour level of the active map is changed by scrolling with the mouse. You can change which map is active using the radio button in the Maps panel. If the active map is not currently displayed, the contour level will not change.
3.2. Map preparation
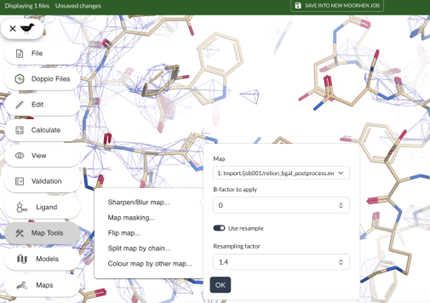
Moorhen can easily blur and resample the map to make it smoother and easier to interpret. To oversample the postprocessed masked map:
● Map Tools -> Sharpen/Blur map...
● B-factor to apply should be 0
● Turn on use resample and use the resample factor 1.4 then click OK. (The resampling can take a minute or two)
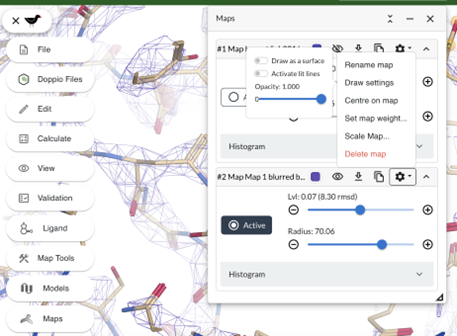
We can also improve the appearance of the map. In the Maps panel, find the resampled map and click on the “Gear” icon, then select Draw settings -> Activate lit lines
Make sure you activate the oversampled map for fixing model errors and real space refinement.
● Maps -> Click on the ○ Active button of the blurred map. And hide or delete the original map.
Recontour the blurred map (see above) if necessary and compare with the original map.
3.3. Initial Map - Model inspection
How well does the AlphaFold model fit the experimental data? Does it fully explain the map density? To inspect this efficiently run: Validation -> Validation plot...
This will display a multiple validation plot. Look at the Density Corr plot (at the bottom).
The first few residues, e.g. Met1, Thr2 and Met3 at the N-term show low density correlation. Click on Met3 in the plot to go to this region of the protein.
We can see that there is no map density for the three N-terminal amino acids Met1-Thr2-Met3. Let’s delete these three residues. Hover the pointer over Met1 (transparent spheres will appear on the atoms), right click and select Delete item (the red X, key: Shift+D). In the pop-up, make sure that Delete mode is RESIDUE and click OK.`
Also do this for the next two N-terminal residues Thr2 and Met3.
Next get a better fit for Ile4 and residues next to it. Rotate the view so you can see the empty density where this residue goes.
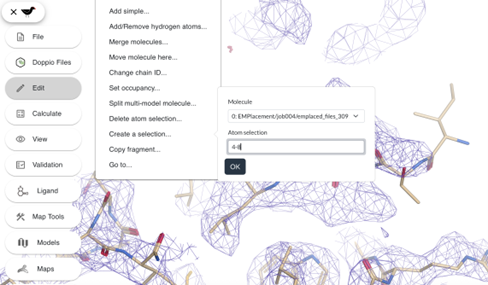
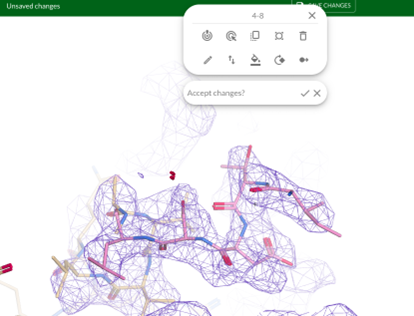
The fit of residues 4 to 7 can be improved. Create a selection of residues 4 to 8 (it is generally a good idea to include a better-fitted residue (Leu8) in the selection) by clicking on Edit -> Create a selection... and type 4-8 in the atom selection box. You can also create a selection by Shift + <click on a residue>.
Refine the selected residues by clicking Refine (the bull’s eye with an exclamation mark).
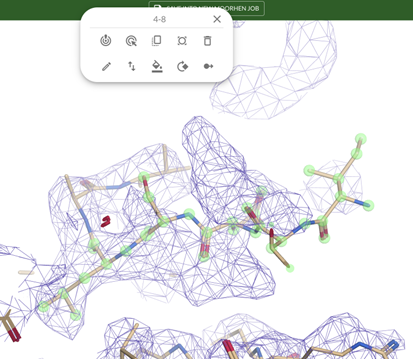
The fit of Leu8 and Ser7 improves but Ile4 to Asp6 should be refined further. Create a selection as before. Click Drag Atoms (the bull’s eye with an arrow) and pull the atoms into the density by clicking on an atom in this selection and dragging it to where you think it should go. When they fill the density accept the changes by clicking on the tick icon.
Then click on Refine again for another round of local refinement. The fit of the N-terminal residues should have improved significantly. Look at the Validation -> Validation plot -> Density Corr plot to see if the correlation has improved.
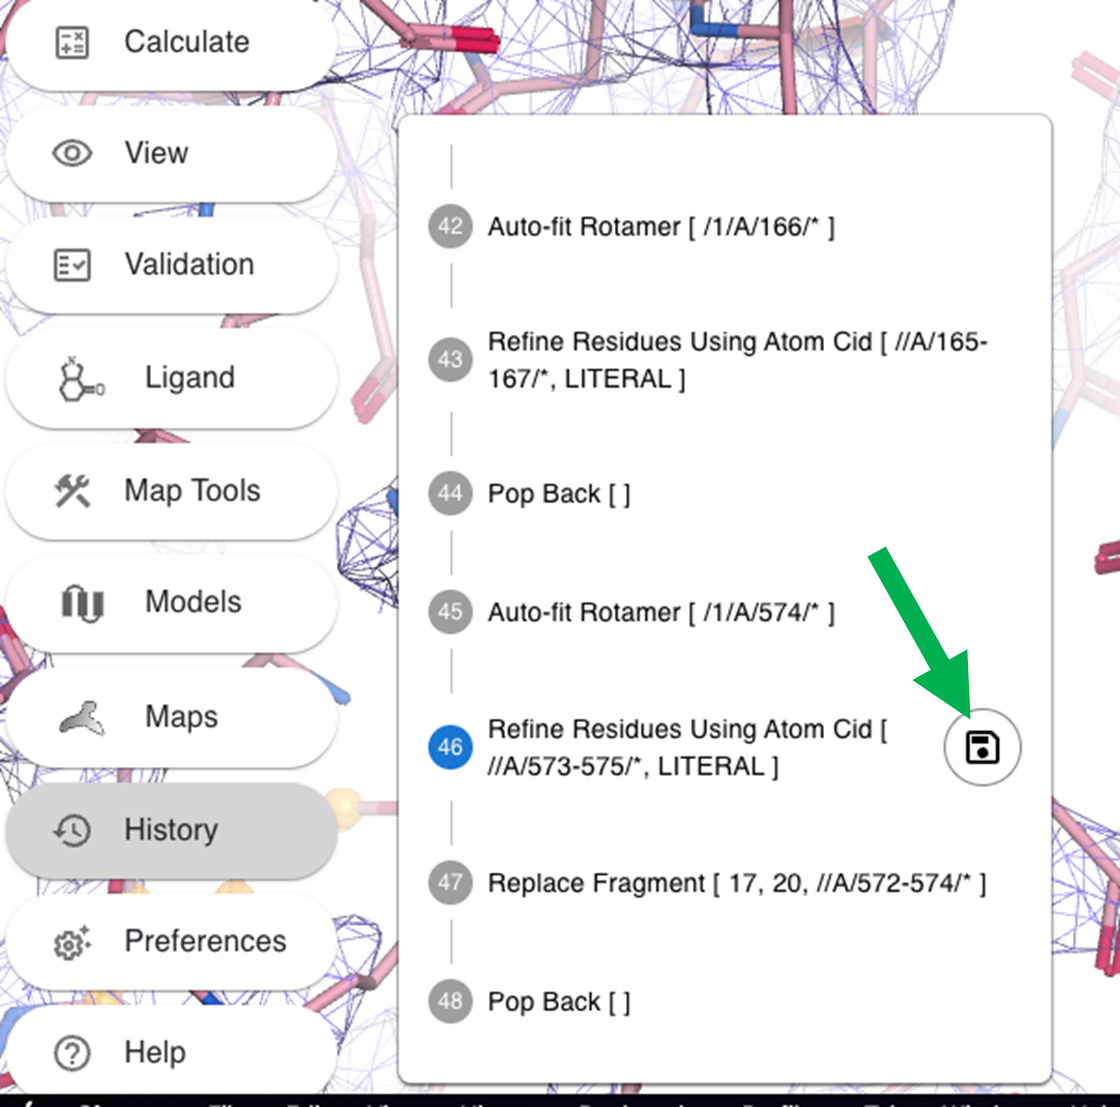
Note that Ctrl+Z can be used to undo changes in Moorhen but this is not perfect at the moment (sometimes skips steps and is limited to last few changes only) or you can use the History menu to reload previous states by clicking on the disc icon.
Let’s inspect the Validation -> Ramachandran plot.
Note: you can move the Ramachandran plot on the bottom left of the window by using this symbol:
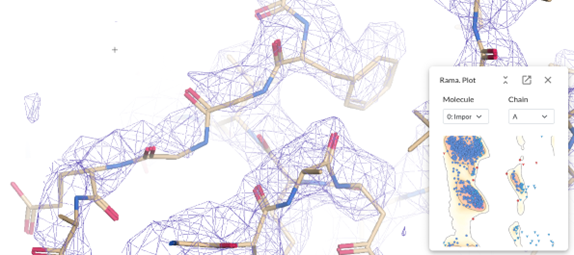
Let’s click on one of the outliers, this case is the residue 276 in chain A, shown in the Ramachandran plot in red in the top right corner. Do right click on the neighbour residue 277 and select Flip Peptide. Or try to flip the residue 276. Also, refinement of these residues can help.
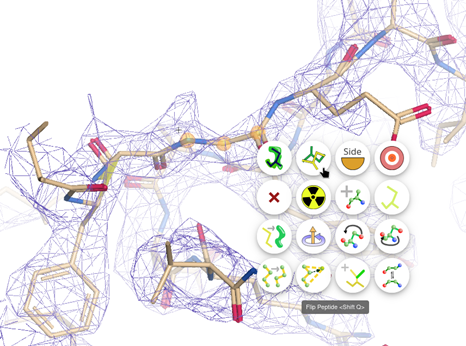
After flipping the peptide the outlier disappears from the plot!
Click the Save into new Moorhen job button to close the editor and save the Moorhen session. The job will appear in your Doppio jobs list, and you can resume the session from the RESULTS tab of that job (click on ‘Edit in Moorhen’). Any changes to the model will also be saved and a new model node will be created for use in subsequent jobs.